What This Guide Teaches
Building a website locally is only the beginning. A complete development workflow also needs a way to track changes, work safely on new features, share the project remotely, test changes before production, and deploy approved versions of the website.
PageDeploy takes you through that complete workflow step by step. You will start with a project on your computer and finish with a production website connected to a custom domain.
You do not need previous experience with Git, GitHub, or Cloudflare Pages. The guide introduces each tool when it becomes necessary.
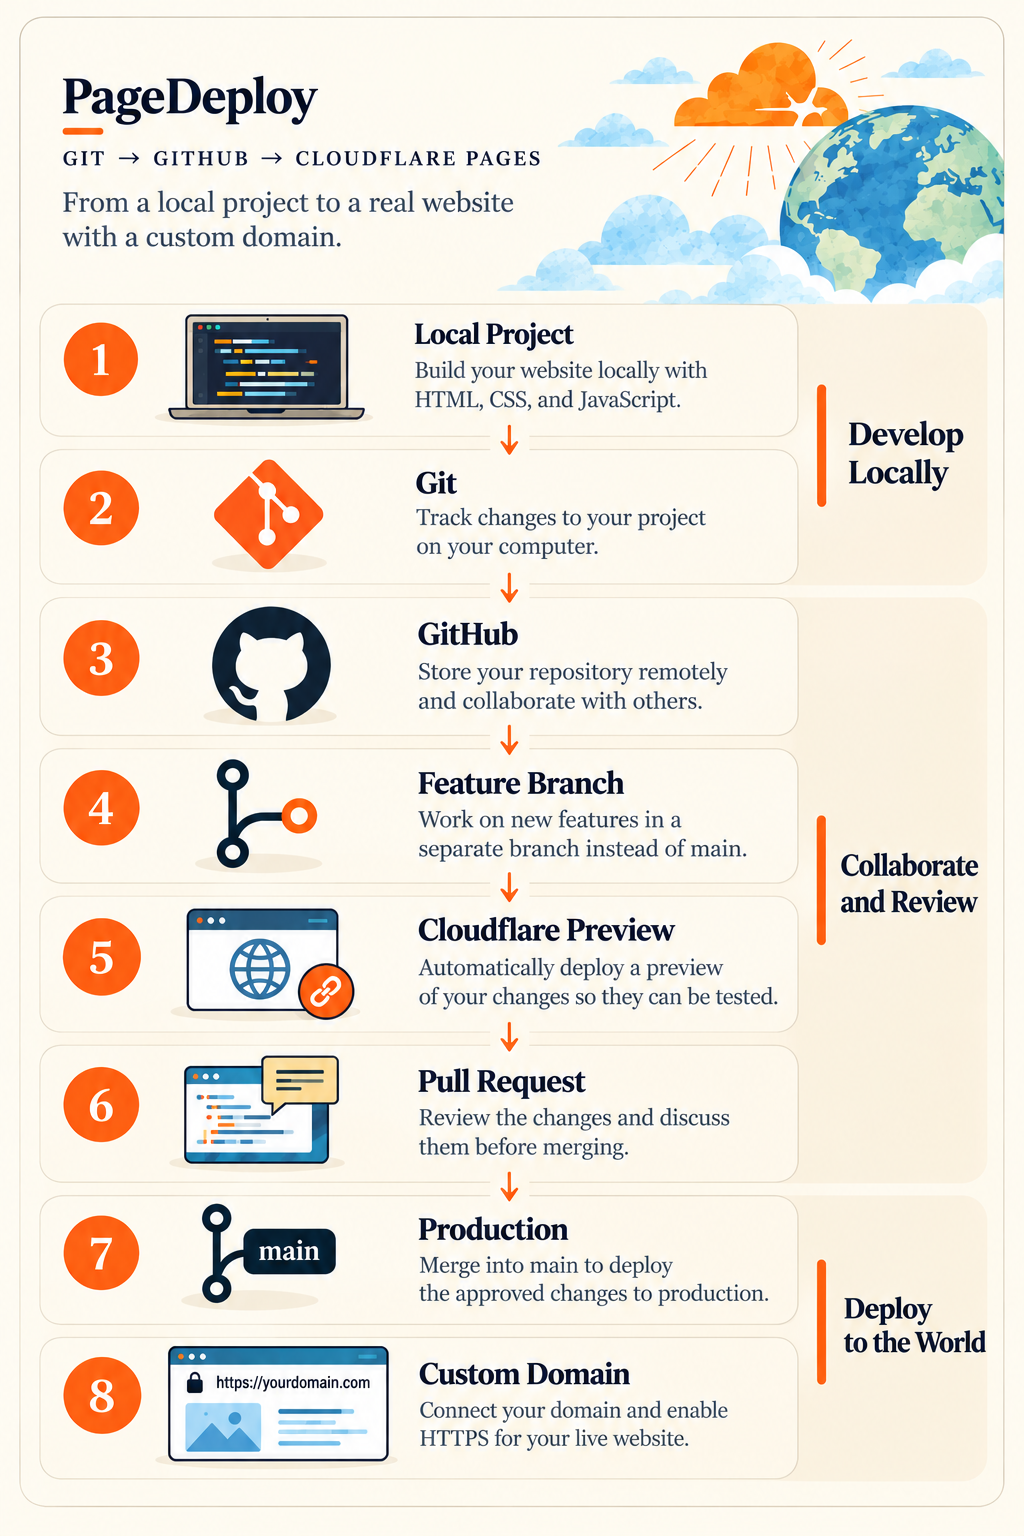
The Complete Deployment Workflow
The guide is built around one connected workflow rather than a collection of unrelated commands.
Local project
      ↓
     Git
      ↓
   GitHub
      ↓
 Feature branch
      ↓
Pull Request
      ↓
Cloudflare Preview
      ↓
    Merge
      ↓
     main
      ↓
Cloudflare Production
      ↓
Custom Domain + HTTPS
      ↓
   Live website
Each stage has a specific purpose. Git records changes locally. GitHub provides the remote repository and collaboration workflow. Cloudflare Pages builds and deploys the project, including preview deployments for changes that have not yet reached production.
By following the guide in order, you will see how these individual pieces fit together into one repeatable development and deployment process.
What You Will Learn
1. Build and Deploy a Project
Start with a frontend project on your computer and learn the Git workflow needed to turn that local project into a repository that can be deployed.
- Initialize and configure Git.
- Track files and create commits.
- Create a GitHub repository.
- Connect your local repository to GitHub.
- Push your project to the remote repository.
- Connect the repository to Cloudflare Pages.
2. Work Safely with Branches and Pull Requests
New work does not have to be developed directly onmain. You will learn how feature branches provide a separate place to develop and test changes.
The guide then shows how a feature branch moves through GitHub and into a Pull Request, where the changes can be reviewed before they are merged into main.
3. Use Cloudflare Preview Deployments
A feature branch pushed to GitHub can produce a Cloudflare preview deployment. This gives you a temporary public version of the website that can be tested before the change reaches production.
You will follow the complete cycle:
- Make a change locally.
- Commit the change.
- Push the feature branch.
- Open the Cloudflare preview.
- Test the change.
- Fix problems and push again when necessary.
- Merge the approved change into
main.
4. Connect a Custom Domain and HTTPS
After learning the development and deployment workflow, the guide takes you through connecting a real domain to the production website.
You will learn how the domain registration, Cloudflare DNS, Cloudflare Pages, production branch, custom domain, and HTTPS fit together.
The final mental model is:
Domain registration
      ↓
Cloudflare DNS
      ↓
Cloudflare Pages
      ↓
     main
      ↓
Production deployment
      ↓
Custom domain + HTTPS
      ↓
Live website
5. Follow a Real-World Project
The guide includes a complete real-world example using a project called Northstar Coffee.
You will see how the same workflow applies to an actual website: start the project locally, create a feature branch, build a feature, commit and push the changes, inspect the Cloudflare preview, create a Pull Request, merge the change, and finally deploy the updated website to production.
This example connects the individual concepts from the earlier chapters into one complete development cycle.
6. Troubleshoot Common Problems
Real development workflows do not always go perfectly. The guide therefore includes common problems you may encounter while working with Git, GitHub, and Cloudflare Pages.
- Changes made on the wrong branch.
- Uncommitted changes.
- A rejected Git push.
- Pull conflicts.
- Merge conflicts.
- Cloudflare build failures.
- A preview deployment that has not updated.
- A production deployment that has not updated.
The purpose is not just to show the successful path, but also to help you understand what to check when something goes wrong.
How the Guide Progresses
The chapters are arranged so that each stage builds on the previous one.
- Chapters 1–3:Understand the workflow and prepare the project.
- Chapters 4–5:Set up Git and connect the project to GitHub.
- Chapters 6–7:Learn the feature-branch development workflow.
- Chapters 8–9:Connect Cloudflare Pages and work with preview deployments.
- Chapters 10–11:Review, merge, and deploy changes to production.
- Chapter 12:Connect a custom domain and verify HTTPS.
- Chapter 13:Follow the complete workflow through a real-world project.
- Chapter 14:Keep a practical Git command reference.
- Chapter 15:Troubleshoot common Git, GitHub, and Cloudflare problems.
- Chapters 16–17:Build safer habits and follow the everyday feature-development cycle.
The Important Idea
The most important thing to understand is that your local project, Git repository, GitHub repository, Cloudflare preview, and production website are connected parts of the same workflow.
A typical change begins on your computer. Git records the change, the feature branch is pushed to GitHub, and Cloudflare Pages creates a preview deployment. After the change has been reviewed and tested, it can be merged into main, which triggers the production deployment.
Once you understand this flow, individual Git commands and deployment settings become much easier to understand because you know where they fit in the overall process.
By the End of the Guide
You will understand how to take a frontend project from local development through version control, GitHub collaboration, preview deployment, Pull Request review, production deployment, and custom domain configuration.
More importantly, you will understand how the individual commands and tools fit together into a repeatable deployment process.